
How Flat and Stiff Does a Floor Need to Be for Large Format Tile?
How stiff and how flat a floor has to be for large format tile, what the Alberta code and the tile standards ask for, and how a basement slab gets ready.
By David Hutten, Owner, Green Ladder Contractors
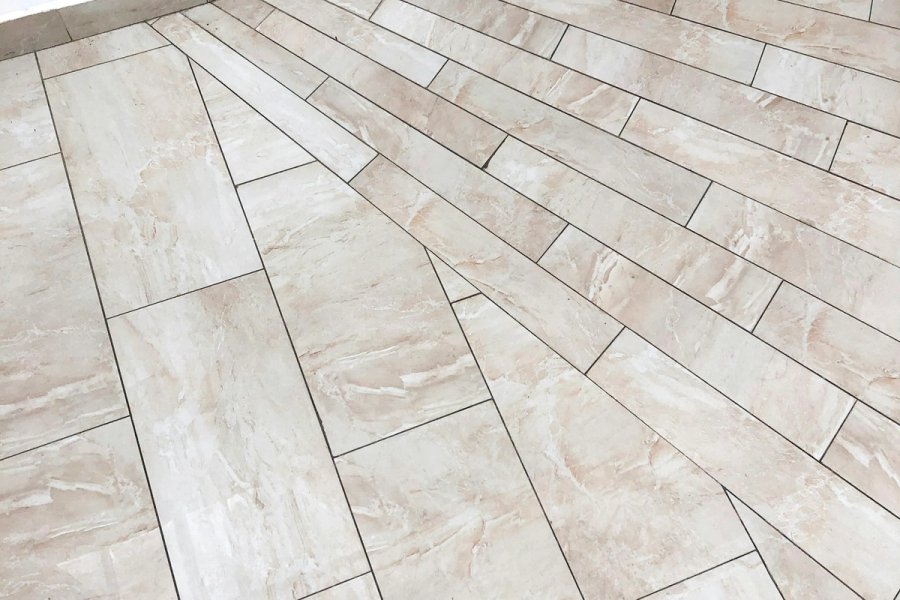
Large format means any tile with an edge 15" or longer, and the floor under it has to be both stiff and flat. For porcelain and ceramic the stiffness figure is L/360 (L/720 for natural stone), and the flatness figure is 1/8" in 10' and no more than 1/16" in 24", half the long allowance for smaller tile.
A 24" x 48" porcelain tile is far less forgiving than a 12" tile. It cannot follow a dip in the floor, it shows a high spot as a raised edge, and it cracks where the floor flexes. Most of that comes down to the floor underneath it.
Here is what that floor has to be, in numbers, with the Alberta code minimums kept separate from the tile industry figures. Our porcelain vs ceramic post covers choosing the tile itself.
What counts as large format?
The tile industry draws the line at 15". The installation standard sets a tighter flatness rule for any tile with at least one edge 15" or longer, and mortar makers use the same line for their large and heavy tile mortars. A 12" x 24" tile qualifies. So does a 6" x 36" wood look plank, because only one edge has to be that long.
How stiff does the floor have to be?
Stiffness is measured as deflection, the amount a joist bends under load, written as a fraction of its span. The National Building Code 2023 Alberta Edition sets L/360 as the limit for floor joists, whatever the ceiling below (Table 9.4.3.1), so a 12' span may bend no more than about 0.4" under the live load it is designed for.
For ceramic and porcelain, the tile industry uses the same fraction. TTMAC (the Terrazzo, Tile and Marble Association of Canada) puts it at L/360 under both dead and live loads, where the code lets dead load be left out of the calculation. On a floor that is close to its limit, that difference matters.
Natural stone is stricter - the Marble Institute of America asks for L/720, twice as stiff, and TTMAC points to that figure for stone. A floor framed to the code minimum is framed to the ceramic number, so a stone floor usually starts with a look at the joists. Schluter, for one, requires a double layer of subfloor under natural stone over its membrane regardless of joist spacing.
The subfloor over the joists
The code sets its own minimum. Table 9.23.15.5.-A asks for plywood at least 15.5 mm (5/8") on joists up to 500 mm (about 19.7") on centre, and 18.5 mm (3/4") at 600 mm (about 24"). A panel subfloor that gets tile set with adhesive also has to have its edges supported (Article 9.30.6.1).
The code also asks for a separate panel underlay under ceramic tile "applied with adhesive", at least 11 mm where the joists are more than 300 mm apart (Sentences 9.30.2.1.(3) and 9.30.2.2.(2)). The same Part treats a mortar bed and an adhesive as 2 different ways of setting tile (Article 9.30.6.1), and the tile standards draw the same line. Organic adhesive, the premixed mastic in a pail, is its own product class (ANSI A136.1), separate from the cement-based thin-set mortars (ANSI A118.1 and A118.4) that large tile is set in. Mastic is not meant to go over a waterproof membrane, and large tile is beyond what it can hold. So the underlay rule is aimed at tile glued straight to the subfloor with mastic, and a large-format floor set in thin-set over a membrane is governed by the stiffness and flatness numbers above (where a permit drawing reads it differently, the Safety Codes Officer's reading is the one that counts).
Uncoupling membrane makers then set their own requirements, and the warranty rides on those. Schluter's current DITRA installation handbook sets these for ceramic or porcelain over a wood floor.
16" on centre: a single layer of tongue and groove plywood or OSB, at least 19/32" (5/8" nominal).
19.2" on centre: a single layer, at least 23/32" (3/4" nominal).
24" on centre: a double layer, 23/32" plus at least 11/32" (3/8" nominal) underlayment, or a single 23/32" layer under the thicker DITRA-XL.
Look at the middle line. The code accepts 15.5 mm plywood up to 500 mm, which takes in 19.2" joists, and the membrane maker asks for 3/4" there. If your floor is framed at 19.2", it is worth checking this before you choose a tile.
How flat is flat enough?
This is the number that catches large tile. The ANSI A108.02 installation standard, as the Tile Council of North America states it, allows the surface under tile with all edges shorter than 15" to vary 1/4" in 10' and no more than 1/16" in 12". For tile with any edge 15" or longer it halves the long figure: 1/8" in 10', and no more than 1/16" in 24", measured from the high points.
Flat and level are different measurements. A floor can slope gently across a room and still be flat. What gives a big tile trouble is a dip or a hump under a 10' straightedge.
On an older floor, meeting 1/8" in 10' usually means filling the low spots and taking down the high ones before anything else goes down. Schluter's handbook is explicit that any levelling is done before its membrane goes on.
Lippage, the raised edge
Lippage is the height difference between the edges of 2 neighbouring tiles. Under the same standard, the allowance for floor tile with grout joints from 1/16" up to just under 1/4" is 1/32" (0.8 mm, about the thickness of a credit card). With joints of 1/4" or wider it is 1/16".
Tiles are also allowed a little warp from the factory, and a long rectangle shows it. For a running bond pattern with a side over 18", the standard caps the offset at 33% unless the tile maker says otherwise, and asks for a grout joint averaging at least 1/8" on rectified tile and 3/16" on calibrated tile, plus the edge warp of the actual tiles.
How much mortar has to be under the tile?
ANSI A108.5 asks for mortar contact of at least 80% under each tile in dry interior areas and 95% in wet areas and exteriors, spread so every corner and edge is supported. Schluter's handbook repeats the same figures.
Under a big tile that takes a trowel sized to the tile, ridges combed in one direction, and often a skim coat on the back of the tile (Schluter calls back-buttering a useful way to get coverage on tiles 12" x 12" and larger). The mortars sold for large and heavy tile are made to hold a thicker bed without sagging, and one maker's version is rated to exceed ANSI A118.4HT. Over an uncoupling membrane, the mortar comes from the list in the maker's handbook.
Over a basement slab
A basement slab is stiff, and the trouble it brings is cracks, moisture and movement. Schluter's handbook covers all 3 for its membrane. It can go over cracked concrete, but only where the cracks move in plane, side to side, and it states that thin-set tile assemblies, membrane or not, cannot accommodate differential vertical displacement. Where the slab is subject to moisture coming up through it, every seam in the membrane gets sealed.
So any crack where one side has dropped or lifted is worth understanding before tile goes down, because neither the tile nor the membrane will hold it. Self-levelling compound goes on after that, to bring the slab to the 1/8" in 10' figure. Our basement flooring post covers the slab's moisture and cold in more detail.
Movement joints
A tile floor needs room to move at its edges and across its field, and a membrane does not remove that. Schluter says plainly that its membranes do not eliminate the need for movement joints, and points to the industry guidelines (TCNA EJ171 and TTMAC 301MJ). Its own recommendation for interior floors is a joint every 16' to 20' in each direction, tightened to 12' where the floor is heated or in direct sun, plus a joint around the perimeter of any size floor. Those joints stay clear of grout and mortar.
Heated floors
Heat changes 2 things. The cable or mat is one more layer the tile has to sit flat over, and a heated floor is one of the cases where the joint spacing above tightens to 12'. Our heated floors post covers electric versus hydronic and where the heat pays off.
Before you choose the tile
Joist spacing and span first, then the subfloor, then flatness, then the tile size. Working in that order, you find out what the floor needs before any tile is ordered.
We are happy to check your joists and put a straightedge on the floor before you settle on a tile size, and on a 19.2" floor or a stone tile it is worth doing early.
Home Renovations
Basement development, kitchen and bathroom remodels, and whole-home interior renovations across Red Deer and Central Alberta.
See Our Home Renovations Work →Before you sign a quote: What a complete interior renovation quote includes
More from the Green Ladder Blog
David Hutten
Owner, Green Ladder Contractors
David Hutten started building at age 10 and has more than 30 years of hands-on construction experience. Green Ladder Contractors renovates kitchens, bathrooms and basements and builds home additions, garages and decks across Red Deer and Central Alberta.
Ready to start your project?
Book a free 15-minute discovery call. We'll walk through your vision, budget, and timeline.